
Form feeds
WIth WPdirectdebit V4, there’s no longer a multitude of form types. Whatever you want to build can be created with this single form type – single payments, subscriptions, recurring payments with a one-off initial payment, etc.
Also new for V4 is the ability to import an existing payment plan from your GoCardless account, and turn it into a Gravity Form you can start using straight away. We’ll cover that in detail later on.
Here’s an example of a form that sets up recurring payments, and later on we show you how to build something similar.

Creating the form
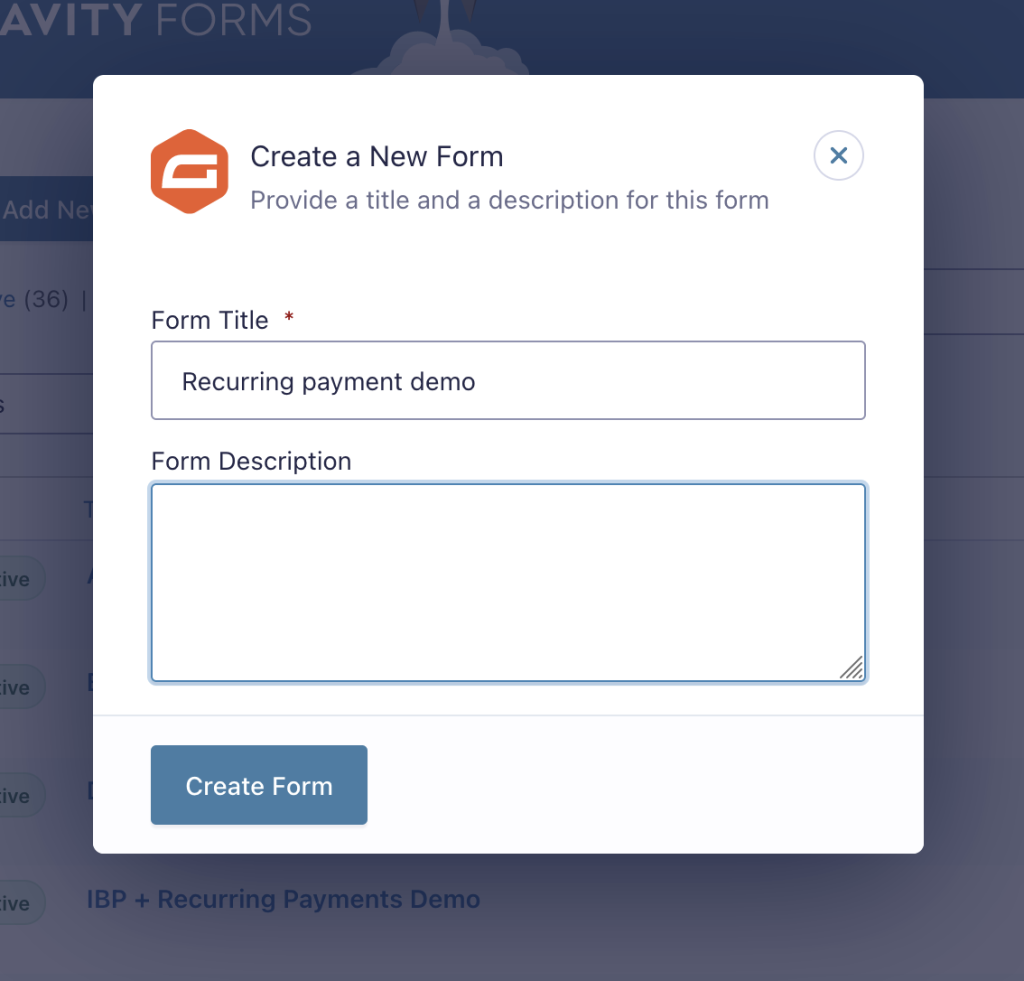
Start by creating a new form in Gravity Forms.
Adding fields to your form
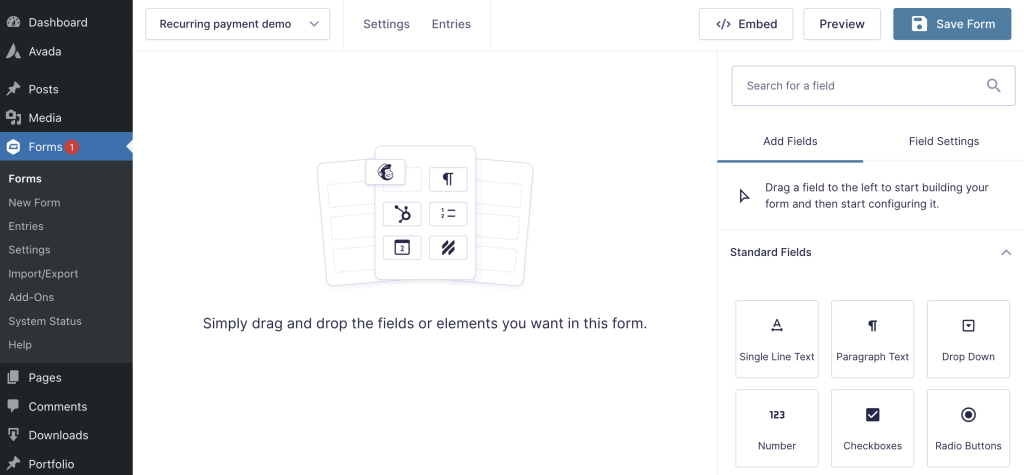
Initially your form is blank. We’ll drag and drop some fields onto it using the Gravity Forms editor.
We’re going to create a form suitable for accepting online donations. We’ll give the donor full control over how much to give, and also how often to donate.
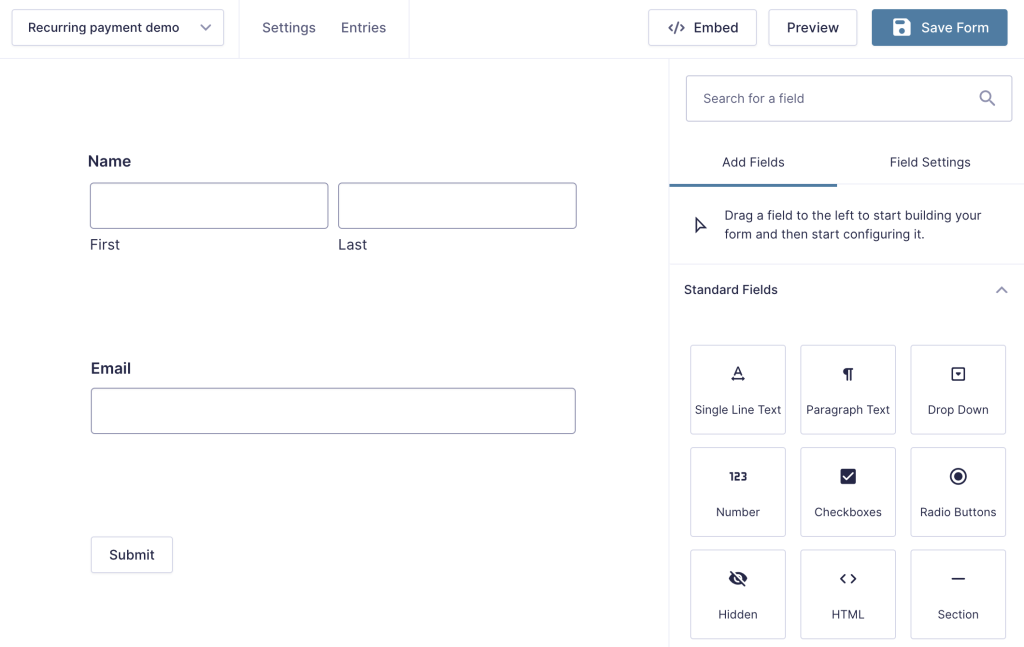
Start by adding a Name field and an Email field. You’ll find these under the Gravity Forms Advanced fields section.
Now we’ll add a radio button field (or a drop-down field if you prefer) for the donor to select how often they wish to donate.
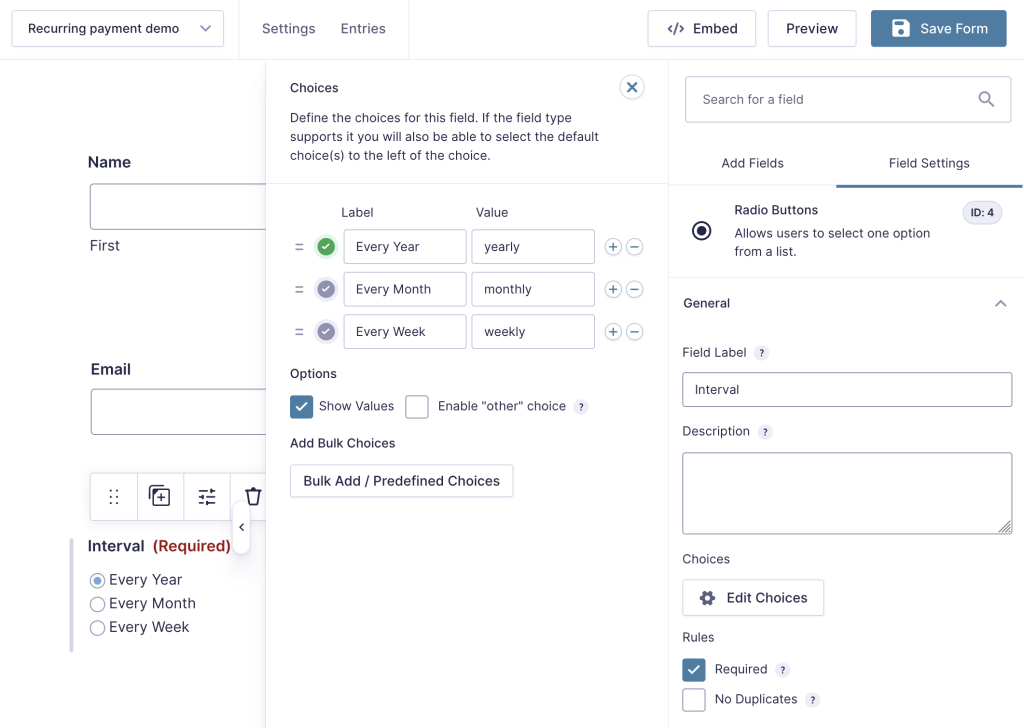
We’ve made this a required choice, and the green check mark shows we selected ‘Every Year’ as the default. The labels can say whatever you like but the values must be any combination of ‘weekly’, ‘monthly’ and/or ‘yearly’ exactly as shown. The order doesn’t matter.
Now we’ll add a product field from the pricing fields section. We’ll choose Radio Buttons for the field type, so we can add some suggested donation amounts, plus the option to enter their own amount. To enter these amounts, click Edit Choices.

In the case where the donor selects the ‘Let me choose’ option, we need to add a field for the amount. We’ll choose another product field, this time the field type is User Defined Price. We’ve called it ‘Your amount’.
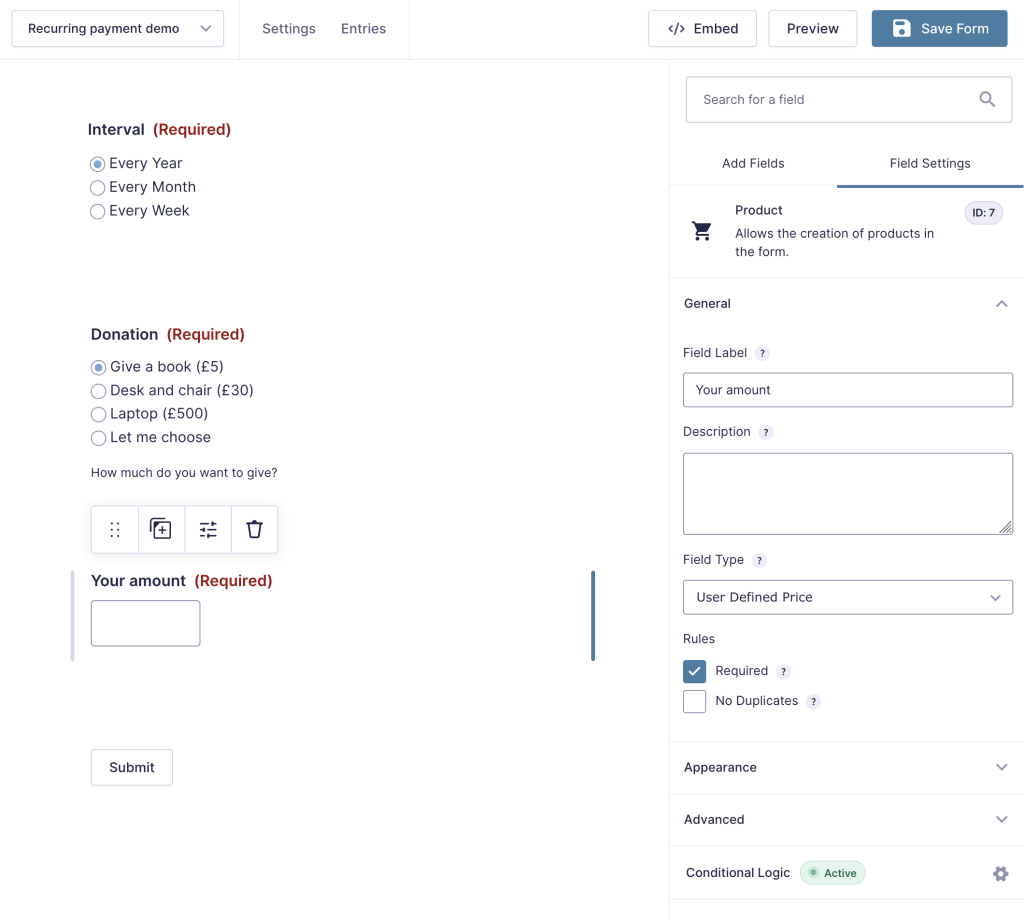
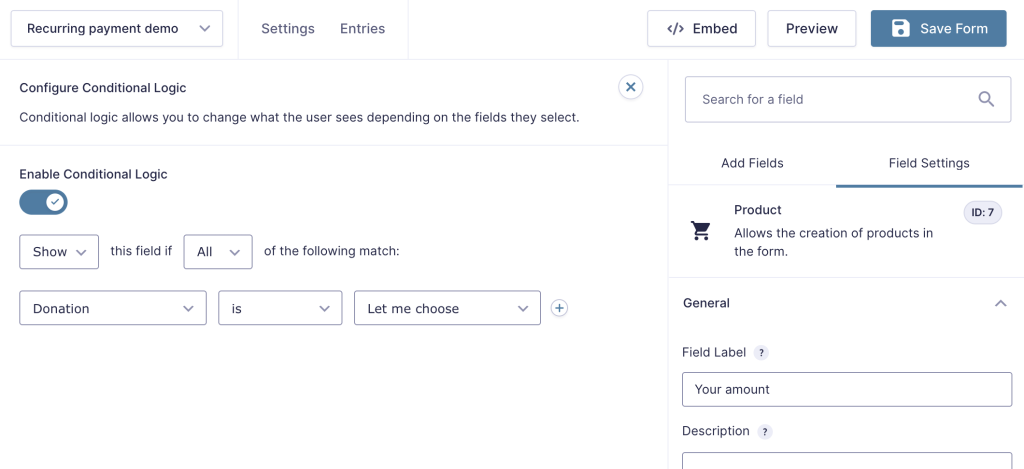
Donors who don’t select ‘Let me choose’ will not need to see this user Defined Price field so we’ll hide it using Conditional Logic. Enable Conditional Logic for this field.

Click the Conditional Logic button to access the Conditional Logic settings. Adjust the drop-downs as shown.
We also need to add a total field for the pricing fields section We’ve labelled this field Regular donation amount.
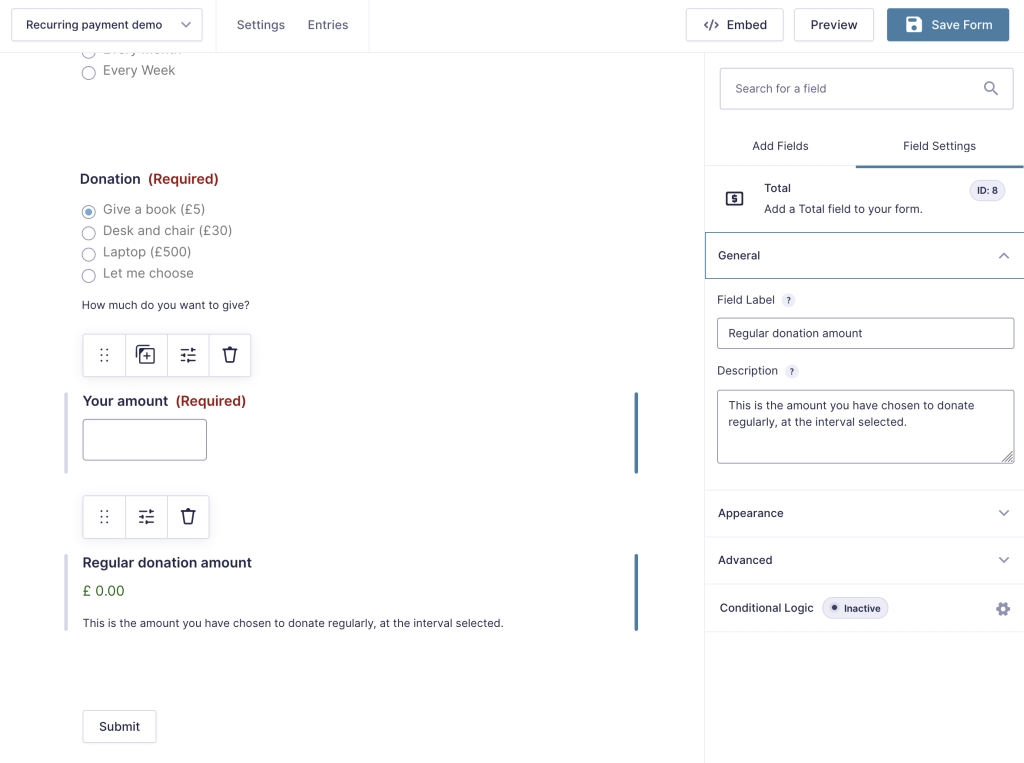
That’s all of the fields you need to collect donations. Save the form.
The completed form looks like this (in form preview):
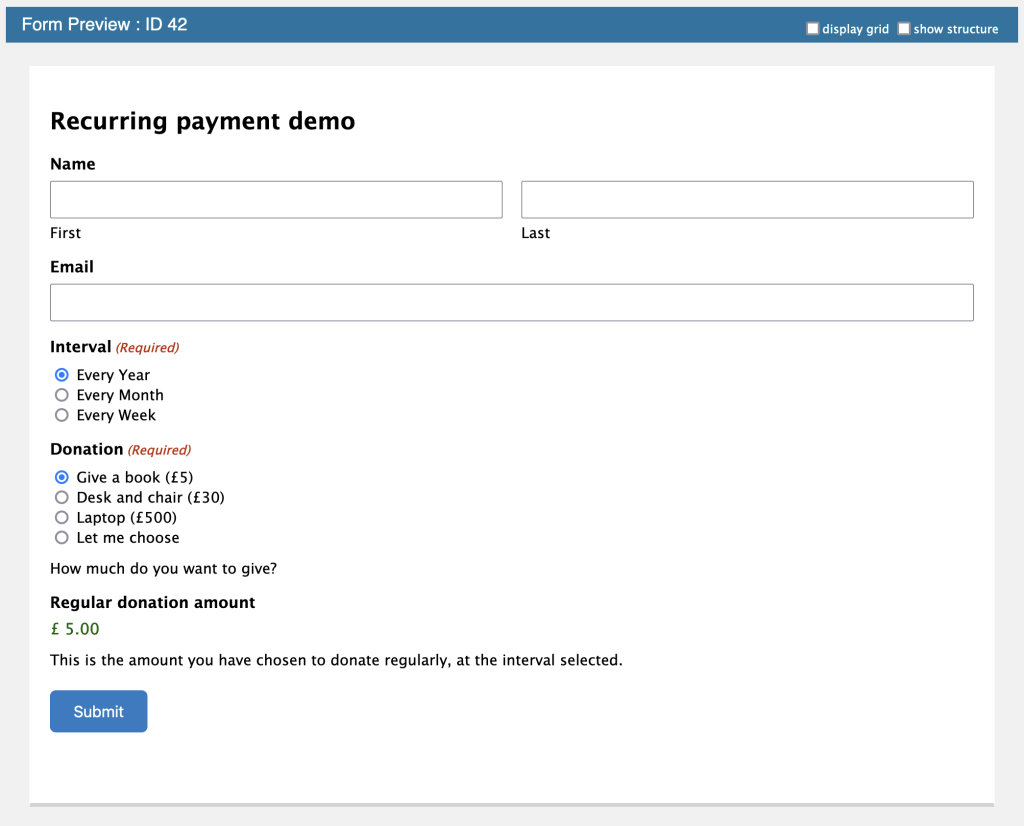
The ‘Your amount’ field will show if ‘Let me choose’ is selected.
You may want to add some more fields, to complete the form. For example:
Address: If you add an address field, you’ll be able to capture donor addresses directly on your website. Perhaps you need addresses for your direct marketeting campaigns. Address fields completed on the form can be mapped and passed to GoCardless so the donor won’t have to enter their details twice.
Gift Aid Declaration: In the UK, a Gift Aid declaration helps the charity reclaim tax.The Gravity Forms Consent field allows you to offer a “yes/no” consent checkbox and a detailed description of what is being consented to. It is available under the Advanced Fields section within the form editor.
Mailing preferences: Capture consent to contact the donor so you have a record of them opting in to receive further communications.
Having added all of the fields to your form, save it and return to the feed settings because you now need to add a GoCardless feed and configure the form feed.
Configuring the form feed
First we’ll explain briefly about field mapping.
What is field mapping?
Some feed settings have a drop-down menu. This menu is populated with the names of fields that exist on the form. By mapping, we mean selecting a field from the drop-down menu. When the user enters a value into this field, it will be associated with the feed field. This is how WPdirectdebit is able to pass the relevant information to GoCardless.
Creating a new feed
With WPdirectdebit highlighted, click Add New to create a feed.

GoCardless Feed Section
Under form settings, select WPdirectdebit. With no feed yet configured, you should see this:

Click 'Add New' to display the feed settings.

Feed name
The feed name is auto generated; you can change it if you wish, it just needs to be unique.
Payment Type
Select the purpose of this form from the options available.
Currency
Select the currency to be used for this form. It can be different from the default currency.
Mandate description
This is shown to the customer in the GoCardless drop-in when authorising the mandate. It describes the standing authority, not a specific payment. Max 100 characters.
Success page
Here, you can map a page that the user will be redirected to if the payment completes successfully. The default action is to stay on the same page.
Exit page
Here, you can map a page that the user will be redirected to if the payment does not complete for any reason. You might want to do this if, for example, you want to offer an alternative payment method or you want to direct them to your customer services page.
Reuse existing mandate
Check this box to skip the GoCardless drop-in if this customer already has an active mandate on this scheme. This requires the Email field to be mapped in the Customer Prefill section. It will only match previous submissions of this same form. Note: Customers may not be aware how easy it is to set up their payment – they may be expecting to have to validate the payment or enter their bank details but, since you already have an active mandate, this is not necessary. It's good practice to notify them on the payment form that if they have an active mandate, no further action is needed on their part.
Subscription Panel
If the Payment type is Subscription (recurring), this Subscription settings panel is displayed. Complete the fields according to your needs. Help is available via the tooltips (hover over the question marks).
Recurring amount
The recurring amount is not shown in the form feed. This will be the value in the Total field on the form when the form is submitted.
Note: You can offset the start date to be after one billing cycle. This is handy if you are also taking an upfront payment (see next section). Your upfront payment could be a different amount from the usual schedule if, for example, you have a joining fee.

Mapping a Start date
If you choose to map the start date to a field on the form, then note how that date is handled, as not every date will be a valid start date.
WPdirectdebit is quite forgiving — it won't fail a submission because of a bad start date, it will just adjust it and log what it did.
Dates in the past or before the mandate's earliest charge date are silently adjusted forward to the mandate's 'next possible charge date'. A note is logged on the entry. The subscription does not fail.
Dates more than one year ahead are clamped to today + 1 year. GoCardless rejects anything beyond that. Again this will be logged, not failed.
Therefore:
- Always use a Gravity Forms Date field, not a plain text field. Gravity Form's own date validation then handles format enforcement.
- Set a minimum date on the Date field so customers can't select today or the past — this prevents the silent adjustment happening without the customer knowing.
- Don't allow dates more than a year ahead — either set a maximum date on the form field or simply document that dates beyond a year will be capped.
If the field is left blank the subscription starts at the earliest date GoCardless allows — this may be the desired behaviour for some use cases, so blank can legitimately be allowed.
Be aware that if a customer picks a date that's too soon and the mandate hasn't cleared yet, the date gets silently pushed forward, which could surprise them.
Upfront Fee Section
The Upfront Fee section allows you to collect a one-off payment at the same time as the customer sets up their Direct Debit mandate — for example an enrolment fee, registration charge, or deposit.
The upfront payment is collected instantly via Instant Bank Payment (Faster Payments), while the mandate is being authorised. The customer completes both in a single GoCardless flow and sees both the upfront amount and the recurring subscription amount before confirming.
NOTE: GBP subscriptions only. The upfront fee uses Instant Bank Payment, which runs on the UK Faster Payments network. This section is only available when the feed currency is set to GBP.
Upfront payment
Choose how the upfront fee amount is determined:
None — no upfront fee is collected. The customer authorises the mandate only.
Fixed — a set amount you specify in the feed settings. Use this when the fee is always the same regardless of what the customer selects on the form.
Map field — the amount is taken from a form field. Use this when the fee varies — for example when the customer selects a membership tier or the fee is calculated by the form.
Upfront payment amount (Fixed only)
Enter the fee in GBP, e.g. 10.00 for £10. Do not include a currency symbol.
Upfront payment amount field (Map field only)
Select the form field that contains the fee amount. Only Number and Total field types are available. The field value is read at submission time and converted to pence before being sent to GoCardless — ensure the field outputs a plain numeric value without currency symbols or formatting.
Upfront payment description
The description that appears on the customer's bank statement and in their GoCardless payment record for the upfront payment. Maximum 100 characters.
If left blank, the mandate description is used instead. Where the upfront fee is a distinct charge from the subscription — for example Enrolment fee versus Monthly membership — it is worth setting this explicitly so the customer can identify both items clearly.
Customer Prefill Section
Form pre-filling is optional. When a customer completes the GoCardless payment flow, GoCardless will ask them to enter their personal and billing details directly. However, if your form already collects those details — name, address, email, and so on — you can map them here so that GoCardless receives the values without the customer having to type them again. As a bonus, the data is captured on the form entry, which you can export, use to create accounts, or integrate with other workflows.
Available fields
You can map any or all of the following eleven fields:
Given name, Family name, Company name, Email address, Phone number, Address line 1, Address line 2, City, Region, ZIP/Postal code, Country code.
Auto-detection
WPdirectdebit will automatically detect standard Gravity Forms Name fields and Address fields on your form and pre-fill the mappings for you. Given name is mapped from the First Name input (.3) and family name from the Last Name input (.6); address lines 1 and 2 and postal code are mapped from the corresponding Address field inputs (.1, .2, .5). You can override any of these auto-detected mappings if needed.
Country code
If you do not map a country code field, the country defaults to whichever country you have set in the plugin's General Settings. If your form serves customers in a single country, you can leave this unmapped.
A note on accuracy
Customers can change any pre-filled details during the GoCardless payment flow, so the values captured on the form entry may not match the details they ultimately submit to GoCardless. This is expected behaviour — the pre-fill is a convenience, not a guarantee of data consistency.
Invalid or unexpectedly long values in mapped fields are silently ignored rather than causing a payment error. The payment will still proceed; the customer will simply be asked to enter the affected fields manually within the GoCardless flow.
Tip: If your customers have a user profile on your website and are likely to be logged in when they complete the form, Gravity Forms can automatically pre-populate name and email fields from their profile — removing the need to enter those details at all. See the Gravity Forms documentation for details.
After Payment Section
This section controls what happens after the customer completes or cancels the GoCardless payment setup.
Success page
Optional. By default, WPdirectdebit respects the form's standard Gravity Forms confirmation after the customer completes payment setup. A text confirmation message is displayed inline, or the customer is sent to whichever page or URL you have configured in the form's confirmation settings.
Set a Success page here only if you need a different outcome specifically for direct debit payments. This is most useful when your form has more than one payment method — for example, a direct debit feed alongside a card payment feed — and you want each to send the customer to a different page after completion.
If a Success page is set here, it takes priority over the form's confirmation settings for direct debit payments only. Other payment method feeds continue to use the form's confirmation as normal.
Exit page
Optional. Where to send the customer if they open the GoCardless payment window but close or cancel it before completing. If left blank, the customer remains on the form page with no redirect.
Unlike the Success page, there is no equivalent in Gravity Forms' confirmation settings for a cancellation event, so this is the only place to configure it.
Pass field data via query string
Optional. Appends form field values to the Success page and Exit page URLs as a query string, using Gravity Forms merge tags.
Example: first_name=&email=
This produces URLs of the form https://example.com/thank-you/?first_name=Jane&email=jane@example.com, which can be useful for personalising the destination page or passing data to analytics.
This setting applies only when a Success page or Exit page is set above. If you are relying on the form's standard Gravity Forms confirmation as the success outcome, use GF's own merge tag support in the confirmation redirect URL instead.
Conditional Logic

By default, the form will be passed to WPdirectdebit for processing, and from there, over to GoCardless, but perhaps you also offer alternative ways to pay, such as by credit card or by PayPal. By adding a payment method field to your form, the user can select their preferred payment method. With conditional logic, you can test this field to find out which method they prefer and then disable all feed processing for all but the selected method. This avoids the possibility of them paying more than once.
Confirmations
As has been discussed, you should leave the confirmation setting for the form set to ‘Text’; otherwise, the payment window cannot open and your customer will not be able to complete the payment.

Notifications
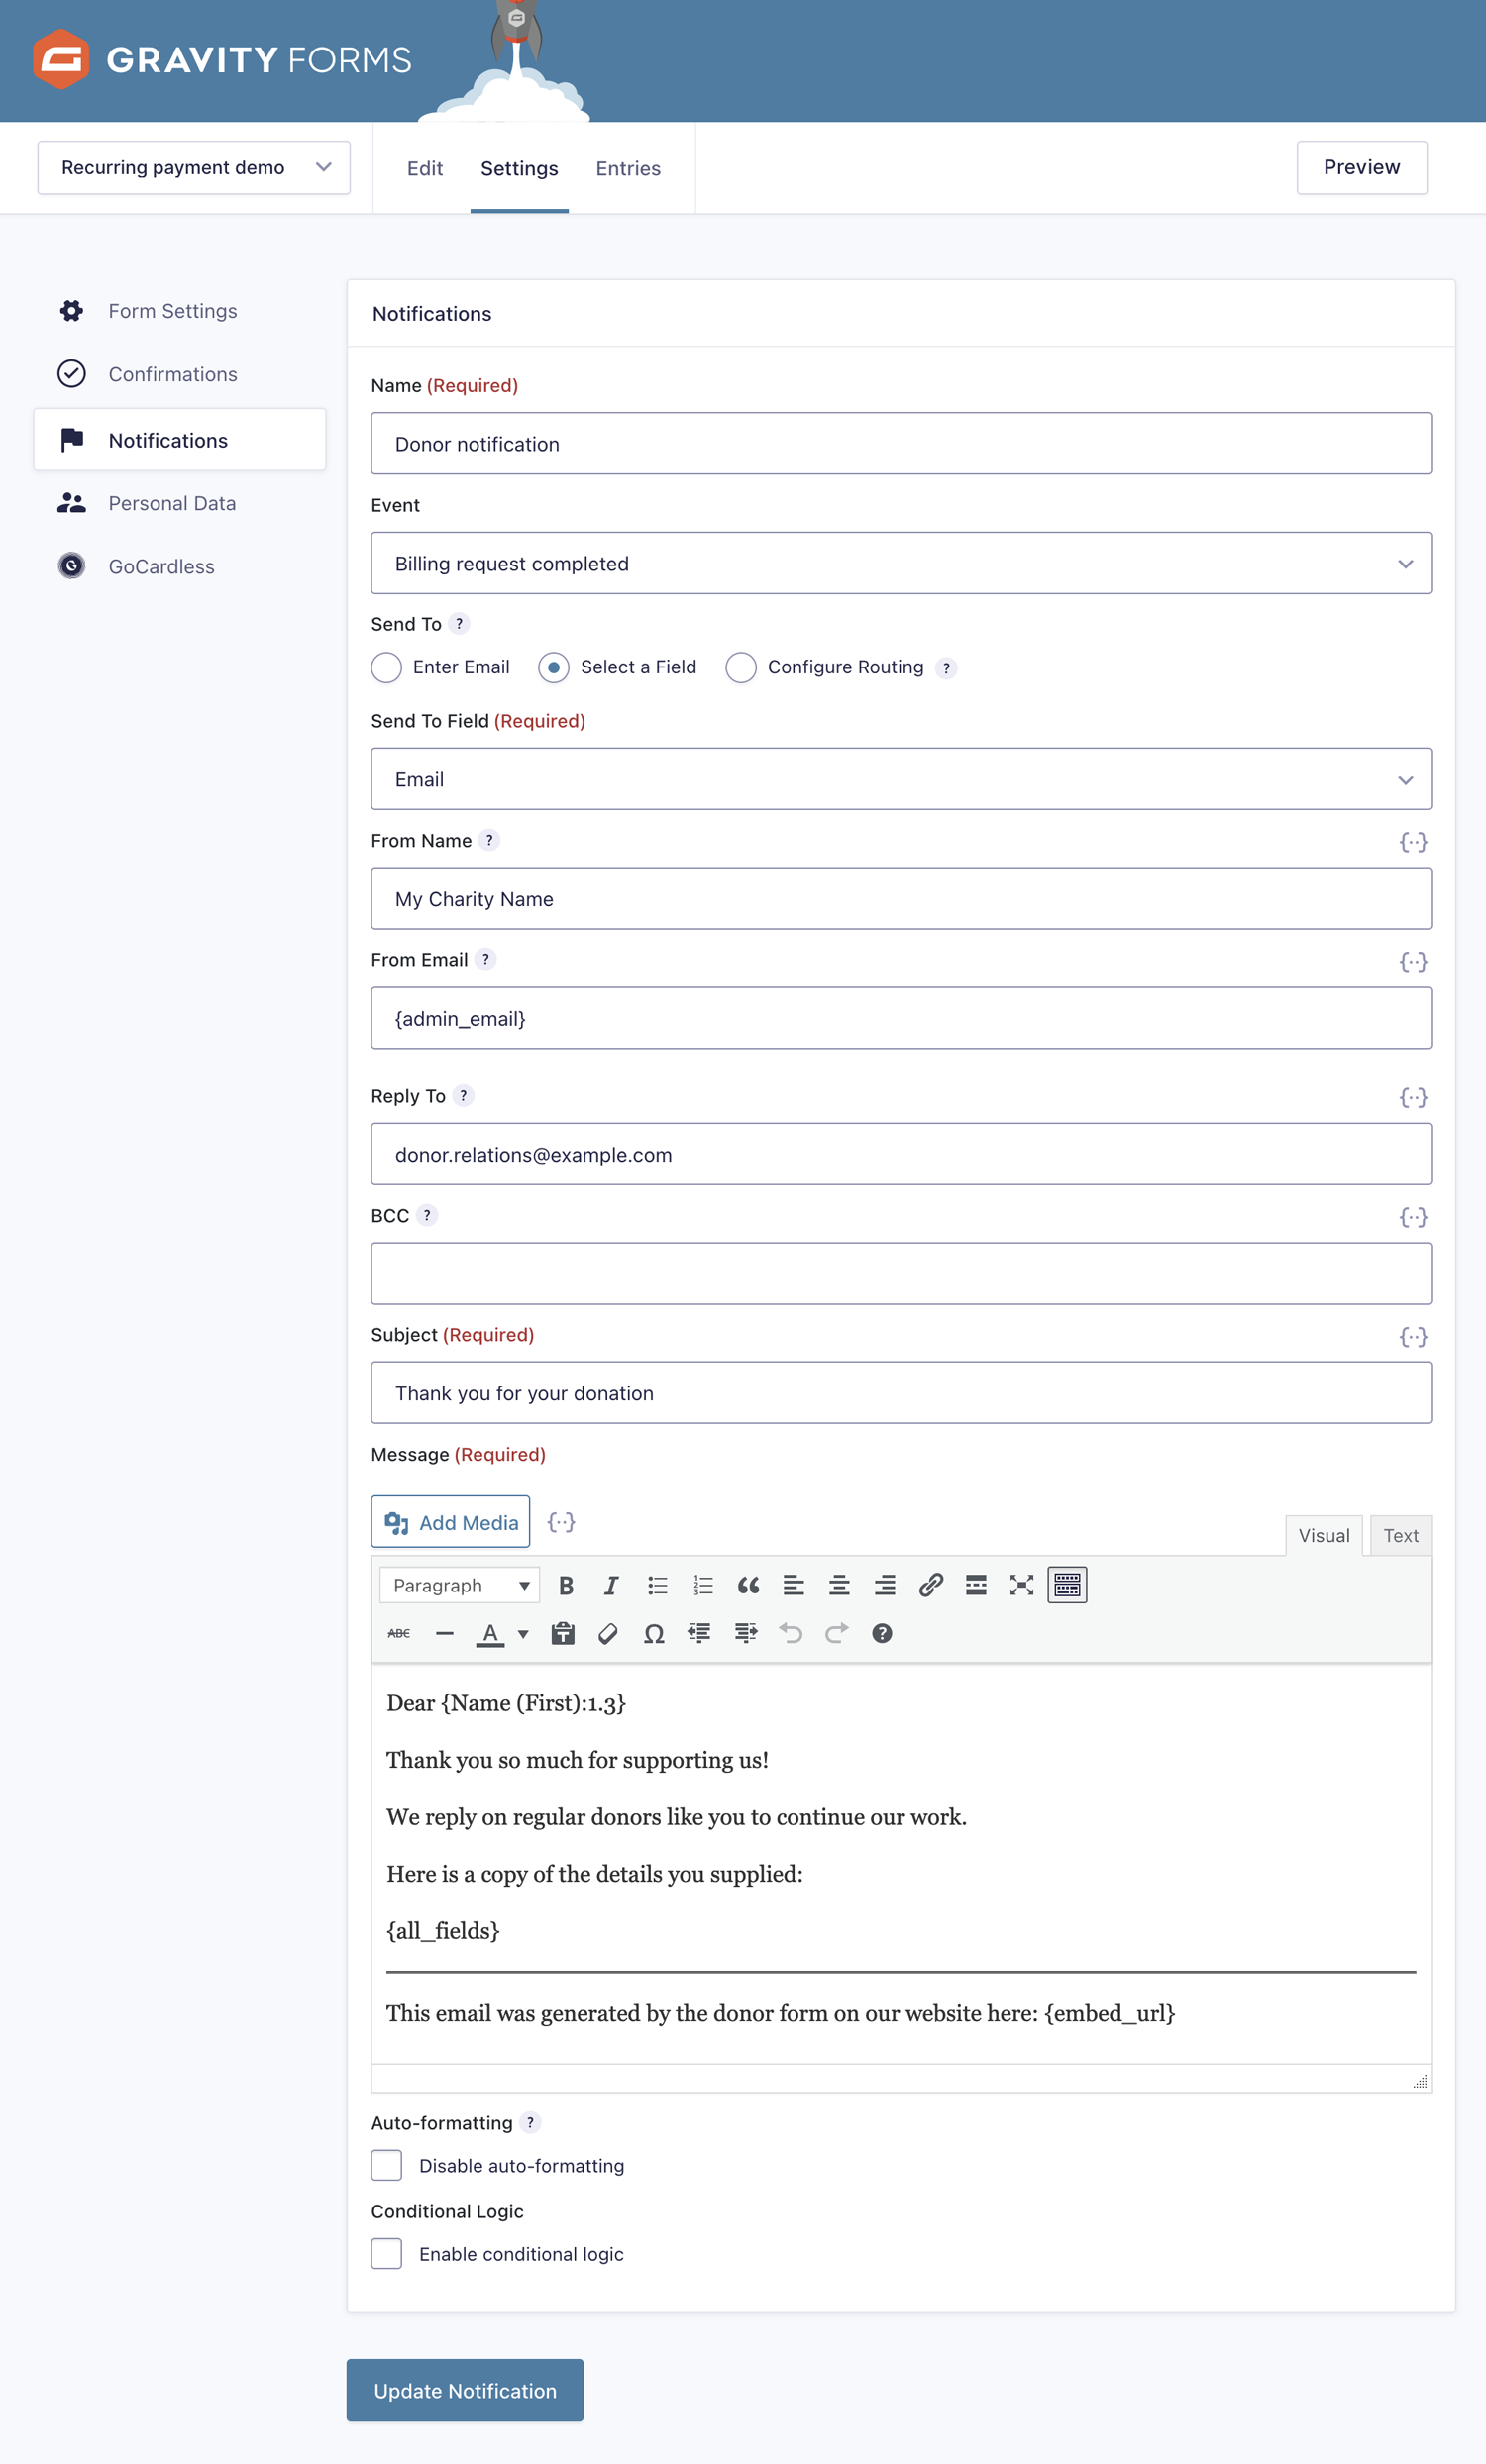
Notifications are emails sent automatically when selected events occur. Gravity Forms handles delivery; WPdirectdebit adds its own events to the Event dropdown for any form that has an active WPdirectdebit feed.
The default notification sends an email to the site administrator when the form is submitted. You will probably want to add a separate notification for the customer — confirming what they have agreed to and including anything they may need at this stage: your refunds policy, customer service contact details, and instructions on how to opt out of any marketing emails they have signed up for.
Choosing the right event
WPdirectdebit adds the following events to the notification Event dropdown:
| Event | When it fires |
|---|---|
| Mandate active | GoCardless has confirmed the Direct Debit mandate is active and payments can be collected |
| Subscription created | A subscription has been created against the mandate |
| Payment confirmed | A payment has been confirmed by the banking system |
| Payment paid out | A payment has been paid out to your bank account |
| Payment failed | A payment attempt has failed |
| Mandate cancelled | The mandate has been cancelled |
For a customer welcome or confirmation email, use Mandate active. This event is triggered by a GoCardless webhook rather than by the customer completing the payment window, so you can be confident the mandate genuinely exists before the email is sent. If your form sets up a subscription, you may prefer Subscription created instead, or send both.
Do not use the standard Gravity Forms “Form is submitted” event for payment confirmation emails — that fires as soon as the form is submitted, before the customer has completed the GoCardless payment steps and before GoCardless has confirmed anything.
Payment confirmed and Payment paid out are better suited to transactional notifications — for example, a receipt — rather than the initial welcome email. Bear in mind that for Direct Debit, the first payment typically arrives several days after the mandate is set up.
Payment failed is worth configuring as a notification to the site administrator, and optionally to the customer, so that failed payments are not missed.
Merge tags
Use Gravity Forms merge tags in the message body to personalise the email with the customer’s name, the amount, or any other field from the form submission.
Compliance
Check the legislation in your jurisdiction for the content of emails sent to your contacts. Requirements vary and may cover mandatory information that must be included, the circumstances under which emails may be sent, and how customers must be able to opt out of marketing communications. The examples provided in this documentation are illustrative only and may not meet your legal obligations.
Adding the form to your site
Gravity forms are embedded using shortcodes like this:
[gravityform id="67" title="true" description="true" ajax="false"]
Note that ajax has been set to “false” here; this is the recommended setting.
Please refer to the Gravity Forms documentation for more information.